Tutorials - Table of Contents
▲Player Tutorial
Joining a Room
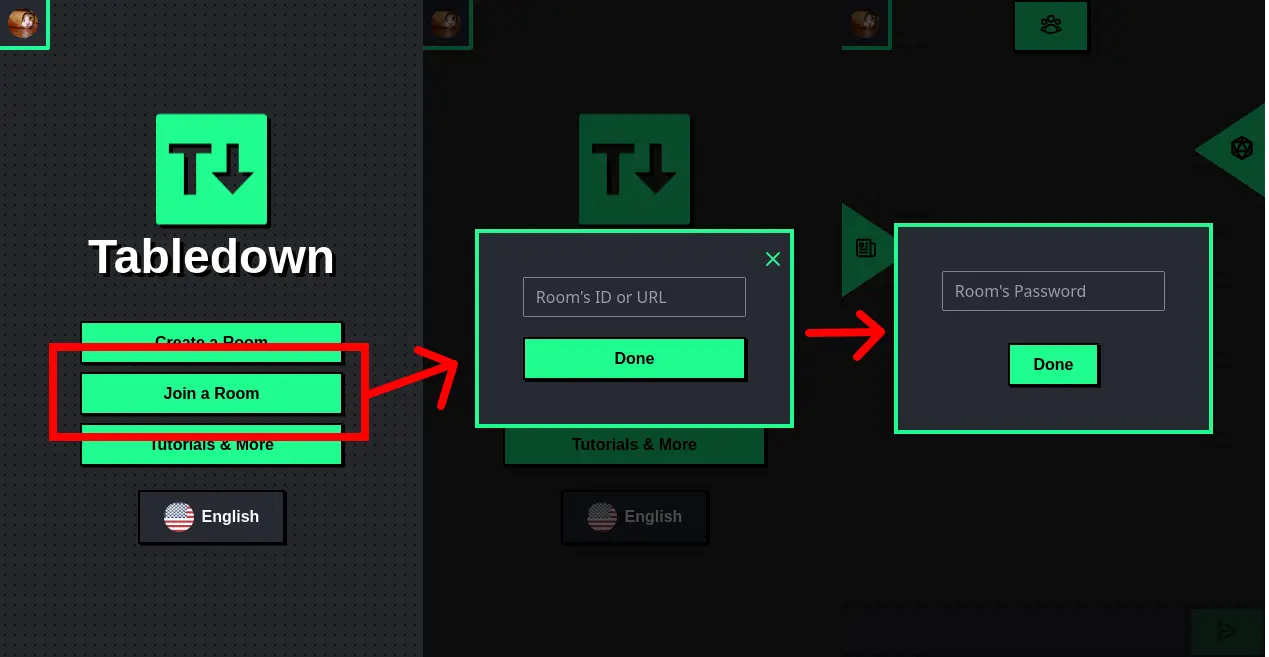
Once you click a room link someone sent you or add the room ID to join through the home-page, you should be greeted by a modal asking you for the room's password, even if the room doesn't have one (in which case you just have to press "confirm" with an empty field), this is mostly to avoid attacks rather than keeping the room private.
Player List and Chat
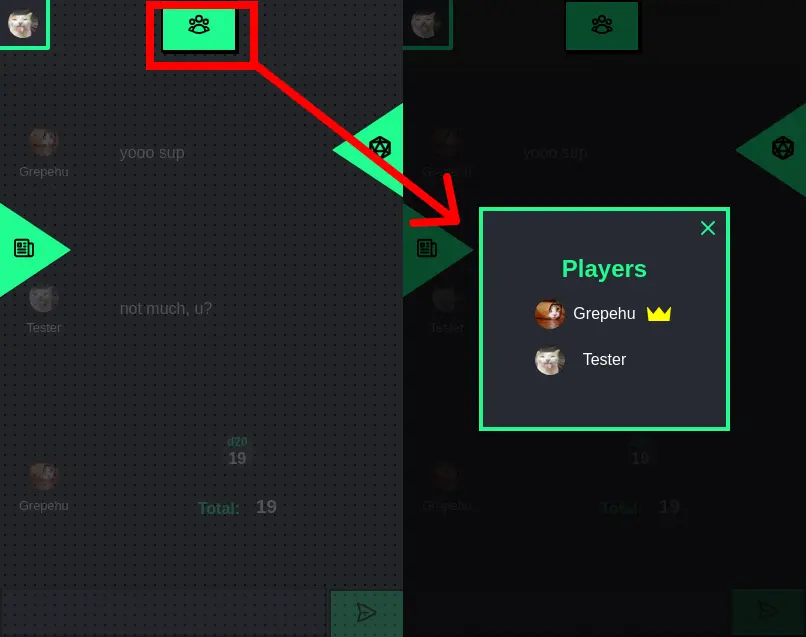
Right in the middle part of the screen you'll have the list of participant players in the room, the room owner being marked with a little crown symbol.
And below this list you'll have a live chat that shows both rolls and messages, in which you can type any message using Markdown and send either by click the button or pressing 'Enter'.
Rolling Dice
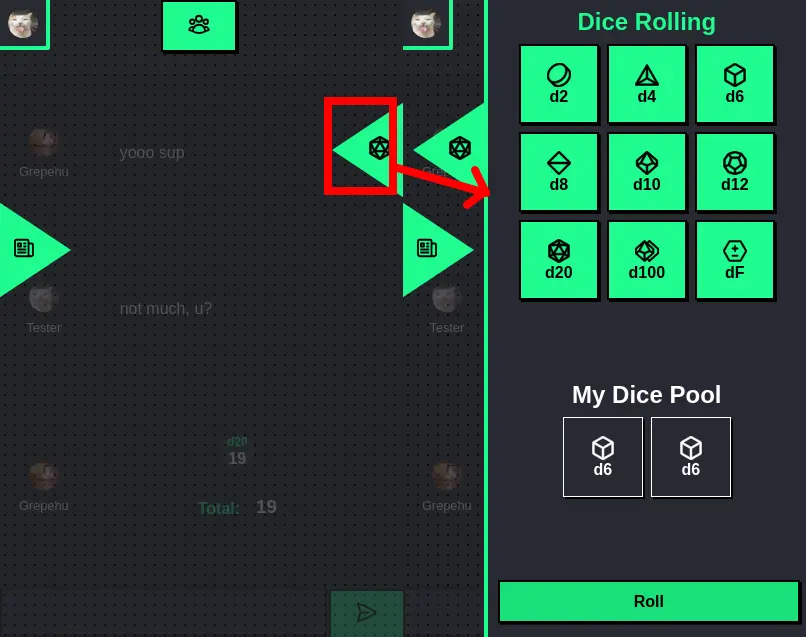
Right to the right you'll have a hovering button that, once clicked, opens the rolling menu where you can select any type of dice and add them to the "Dice Pool" and, once done, you can click "Roll" to roll them all together.
Note you can also click the dice in the "Dice Pool" to remove them from being rolled.
Editing My User Profile
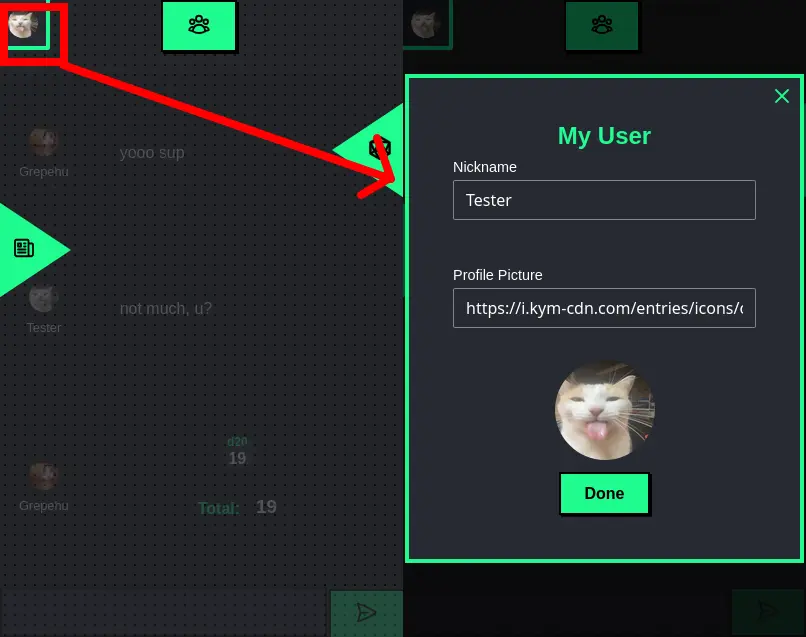
You can, at any moment in the game, click on the top-left corner of the room and open the "User Profile", where you can edit your current nickname and profile picture.
Sheets
When you first join a room you won't have any sheets, so you must ask the room owner to give a sheet to you so you can add your character's information, for example.
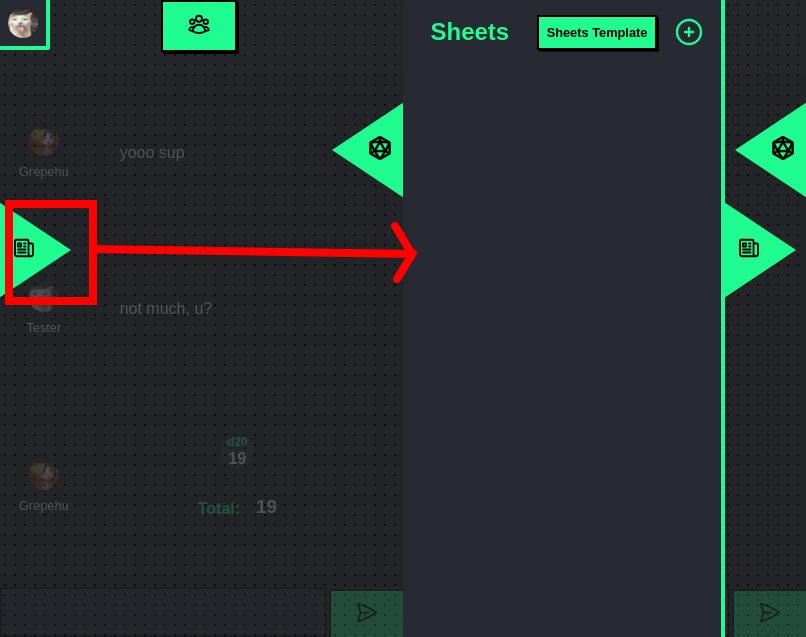
Once the room owner gives you a sheet, you'll be able to open it in the sheet's menu and you can edit the text in it by clicking twice on its content or clicking in the pen icon above the text, opening a Markdown editor.

Inside the sheets you may have several tabs that you can switch and edit to store different types of information. Some features in the Markdown editor, like the "Counter" and the "Checkbox", can be edited even without clicking twice on the content to open the editor.
Finally, there are some sheets where the room owner may give everyone access to only see them but not edit, so you'll be able to check their content in the sheet's menu, but even clicking twice on them won't allow you to open the editor.
Maps & Tokens
When the room owner activates a map a new button will appear beside the "player list" button above the chat. While in the map grid open any user can:
- Move any token by clicking and holding the token to a new cell;
- Ping a cell by double-clicking the cell;
- Zoom in/out by using ctrl+scroll (or using double pinching movement on mobile);
Users can't add new tokens to the grid without the room owner, but the user's profile picture is always by default one of the available tokens for the room owner to add.
Room Owner Tutorial
This tutorial does expect you to have already read the previous "Player Tutorial"!
Room Configurations
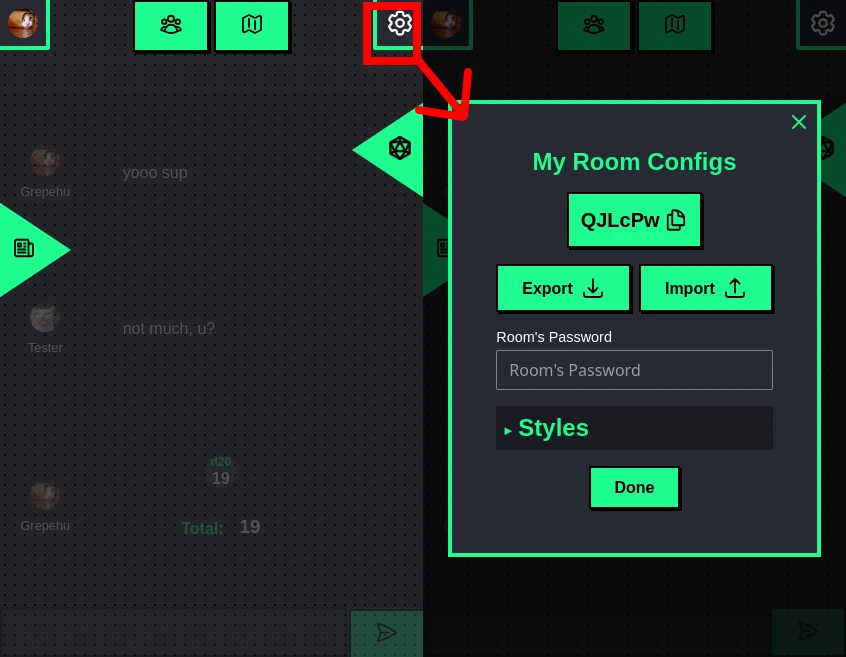
Once you create and join a room, you can always access the current room's configuration by clicking on the top-right button.
This allows you to change the room's password, copy the room ID or export/import the room data (everything in it, including sheets, templates, chat and rolls) so you can continue your game in the future.
Room Styles
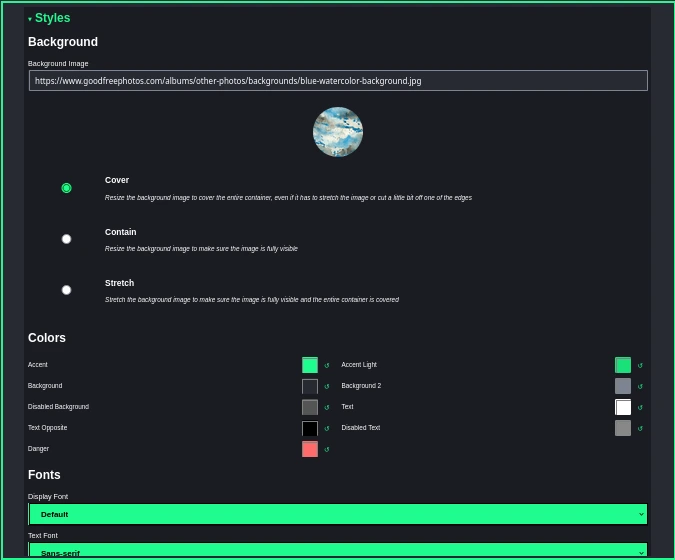
Still inside the room configurations we have a section called "Styles" where the room owner can edit the background image, colors on the app and text fonts to match the game style they'll be running.
Sheet Templates
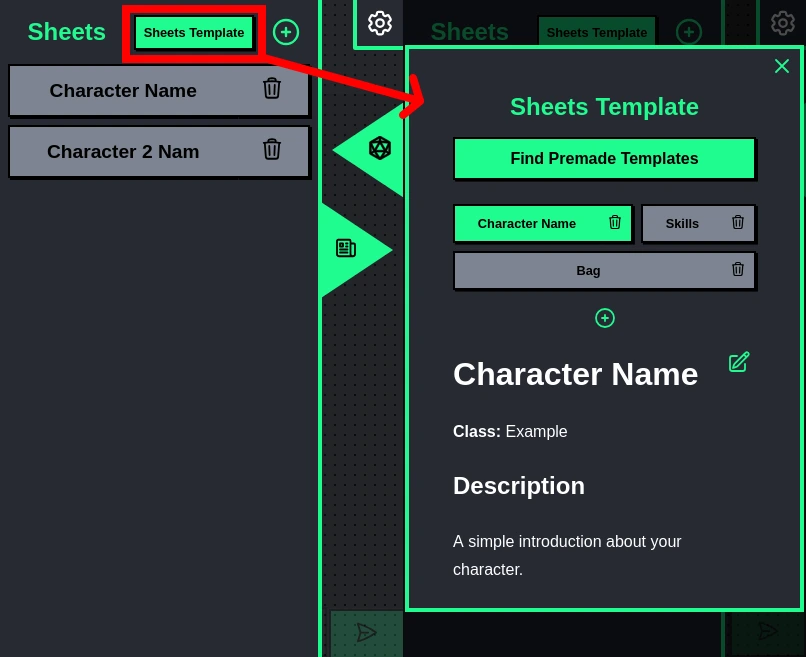
In the sheet's menu for the owner there are two extra buttons, the "Sheets Template" and the "+". The sheets template one takes you to a modal where you can change the current template used for every sheet created in this room.
In simple terms, when you create a new sheet by clicking the "+" button, what it effectively does is copy the contents from your template into a new sheet, so it's basically an easy way to have a common sheet format between multiple sheets without having to write them from scratch every time.
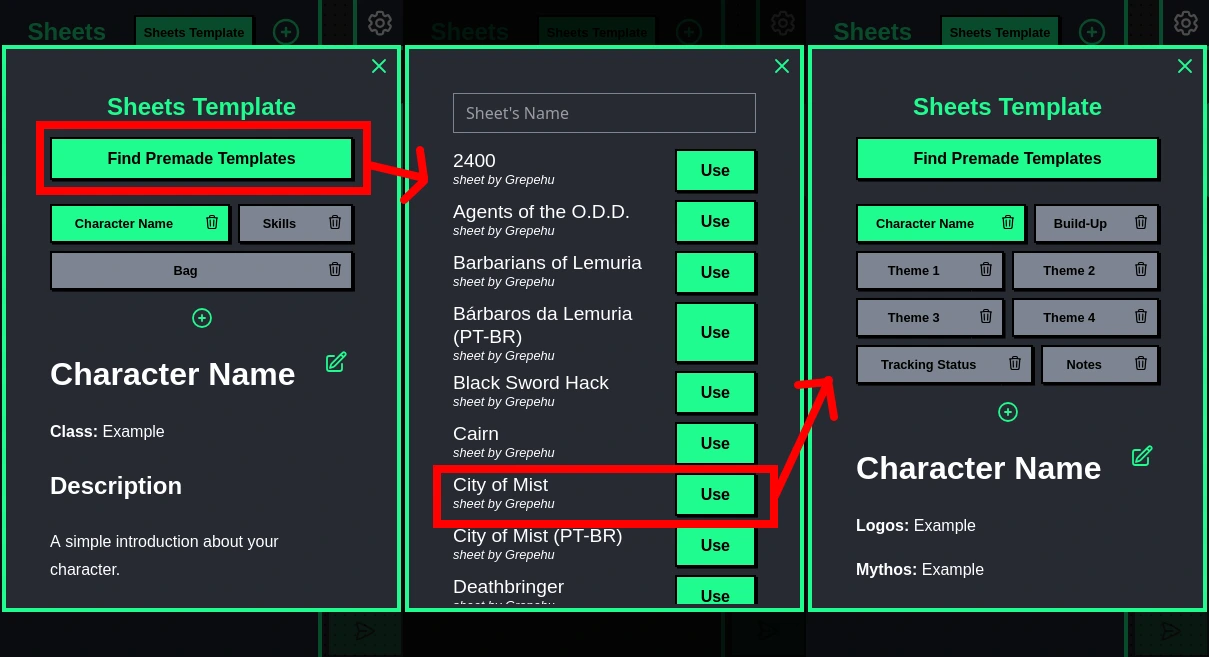
In your Sheets Template editor, you can edit sheets' contents like usual by clicking twice on their content, but you can also add new tabs and delete tabs.
In case you don't want to bother creating your own sheet template, you can click "Find Premade Templates" to use one of our own templates we created for multiple games.
Just a reminder: sheet templates will only affect new sheets created. The old ones will remain using the format you used to create them previously, so you may have different sheets for different purposes.
The Sheets
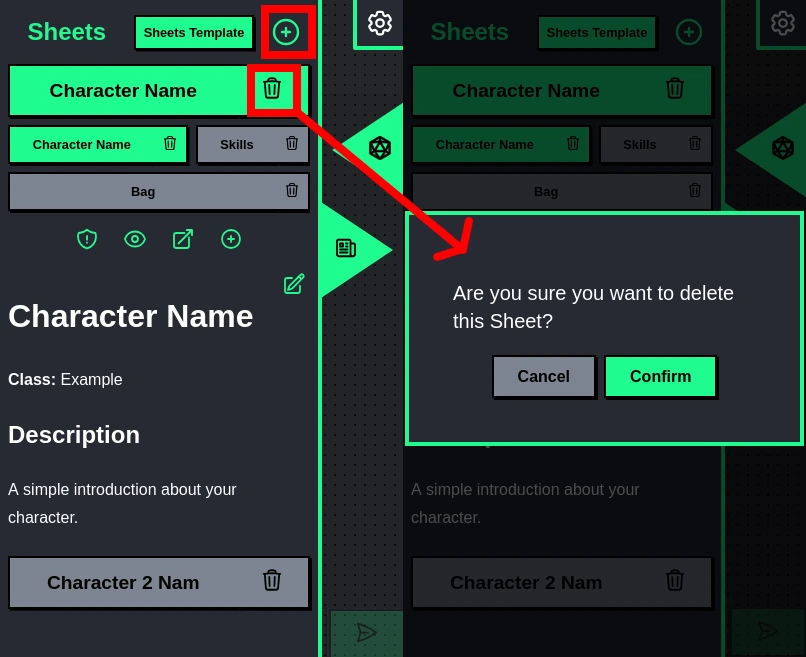
Once you create a new sheet based on your template, you'll notice you have a few more options compared to the player's view. For starters, you can see that you can create and delete the whole sheet at any given moment.
Sheet ownership
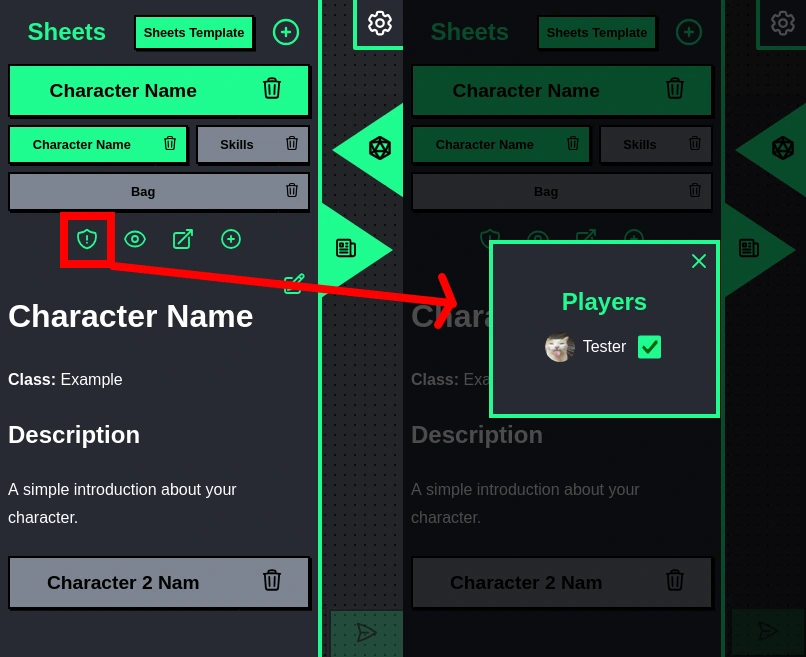
The first option above the sheet's tabs is the "shield" icon that allows you to change the ownership of a sheet, which allows other players to edit the sheet. Note in the GIF below how the user has no sheets but once given ownership of one, it appears on their screen and allows them to edit it:
Also, note you can give the same sheet to multiple players.
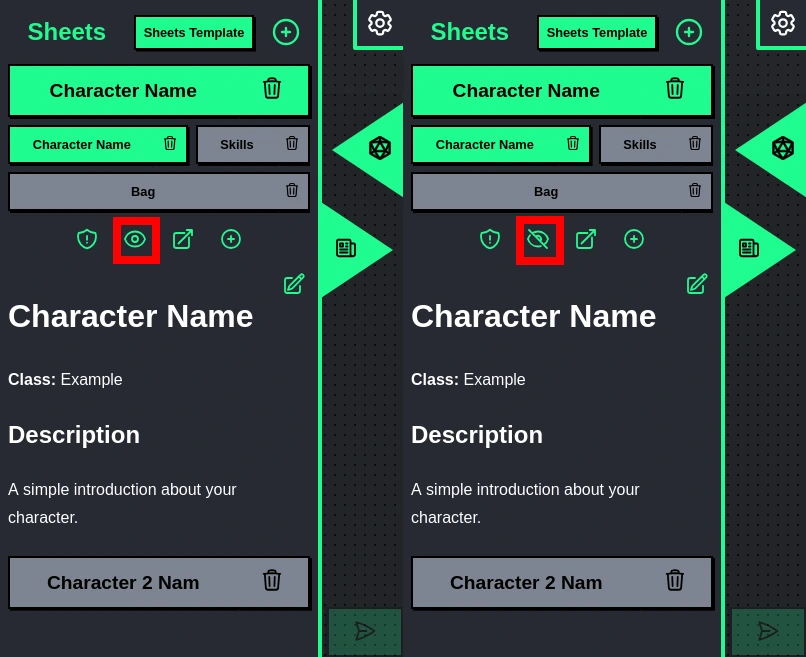
Sheet Visibility
The second button above the tabs is the ability to change the visibility of a sheet. By default, all of them are hidden and can only be seen by users that own them. Changing visibility allows everyone in the room to see them but not edit them.
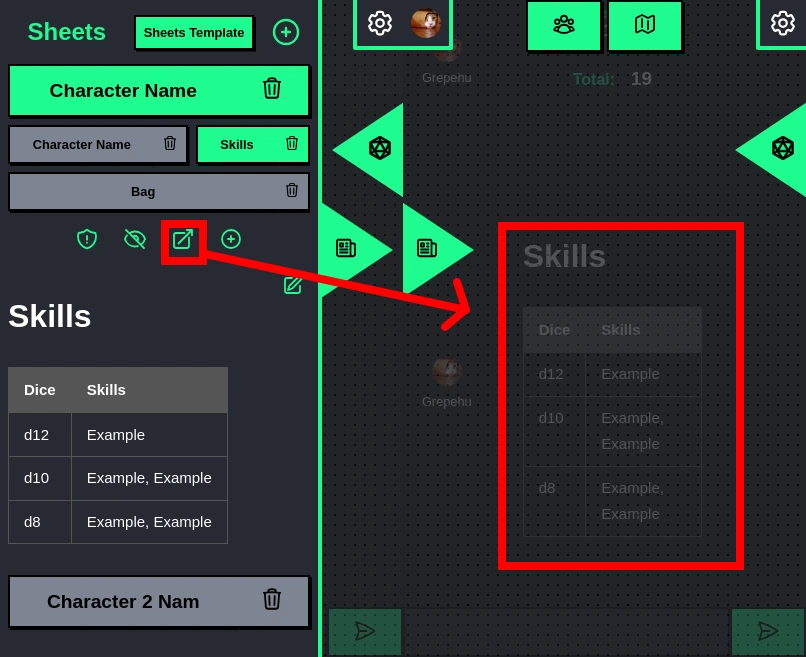
Sheet Tab Logging
The third button above the tabs allows you to log to the chat the current tab you are looking at to the chat, specially useful if there are specific pieces of information you want to dump on players at some point in the game.
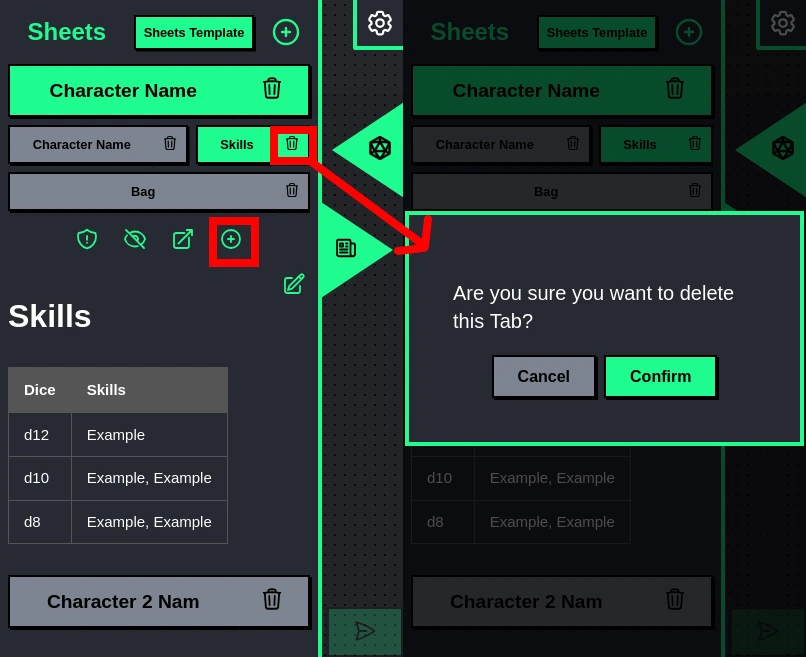
Sheet Tab Adding
Finally, the last option allows you to add a new tab to the sheet (don't worry this doesn't affect the sheet template), as well as deleting the existing tabs.
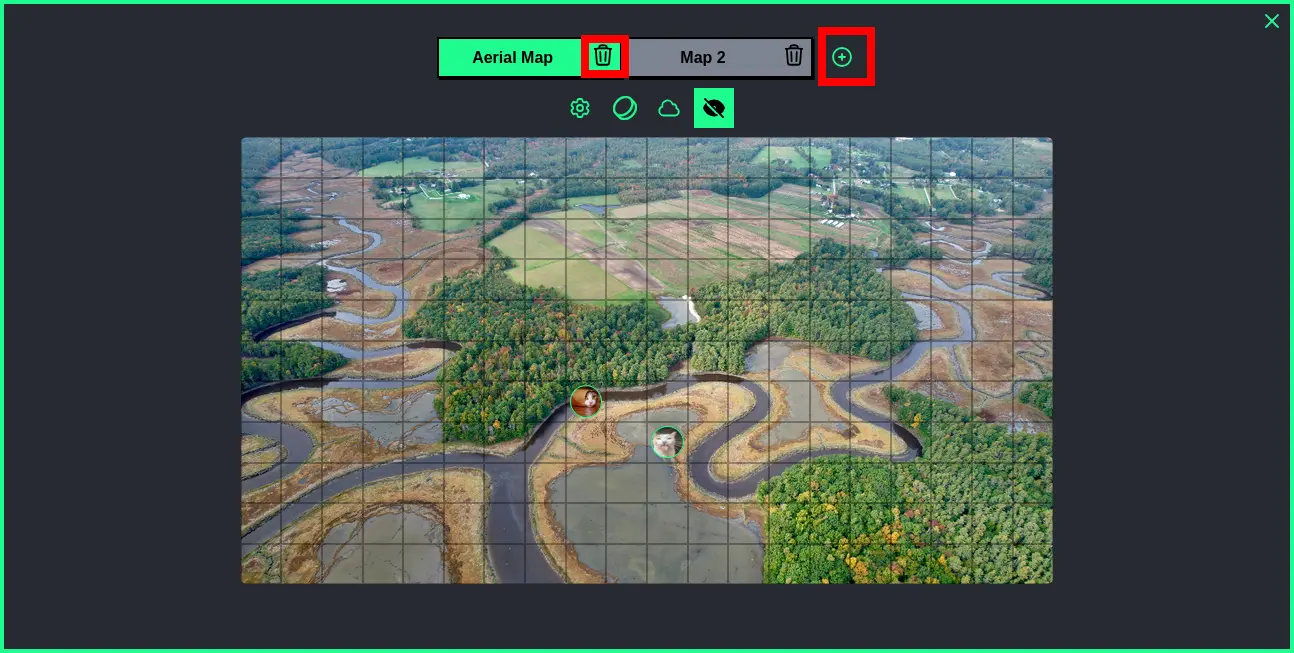
Maps & Tokens
Like for sheets, the room owner also has many more options in the maps menu view compared to the players, for starters the room owner can see more than one map at once at the top, where they can add and delete the maps as they see fit.
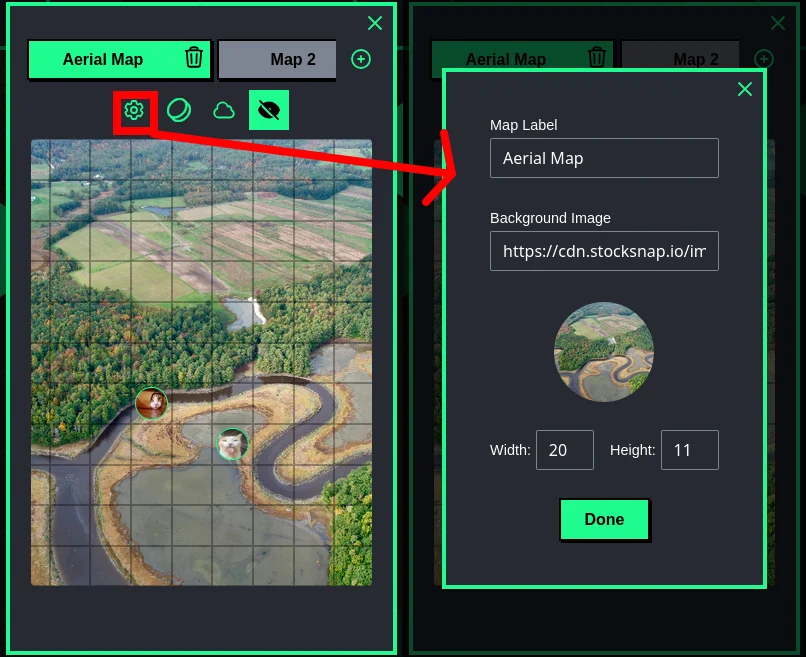
Map Settings
When you have one map selected you'll see a gear icon that takes you to the main settings for the selected map like map label, map image URL and its X/Y coordinates for width and height used.
Token List
The second button in the map tools is the token list, inside this one you'll have access to all the users' profile pictures as tokens by default. You can also add new tokens with the "+" button to the right as well as delete tokens by grabbing the token and throwing them into the left trashcan icon that will appear to the left (this is how you remove the tokens from the grid also).
Grabbing the tokens from the token list and throwing them in the grid is how you add them to the grid for every player to use.

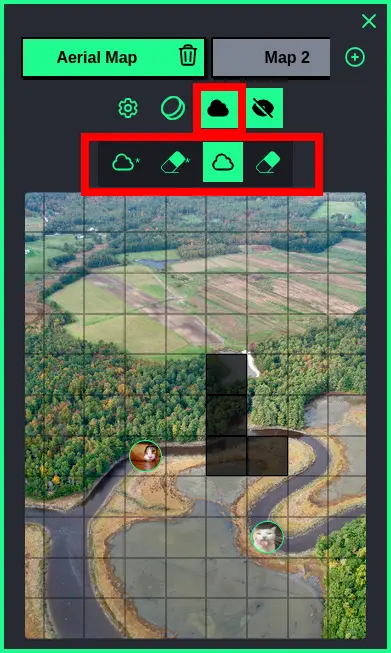
Fog of War
The third button in the map tools is the fog of war tools, that is comprised of four tools:
- Cloud with asterisk icon: This adds fog of war to every cell in the current map;
- Eraser with asterisk icon: This removes fog of war from every cell in the current map;
- Cloud icon: This adds the fog of war paint to your cursor, now you can click and drag to paint any cell in the map grid with fog;
- Eraser icon: This adds the fog eraser paint to your cursor, now you can click and drag to remove fog of war from any cell in the map grid;
OBS: Remember to click again on the cloud and eraser icon to remove them paint event from your cursor once you're done, otherwise it'll keep on working.
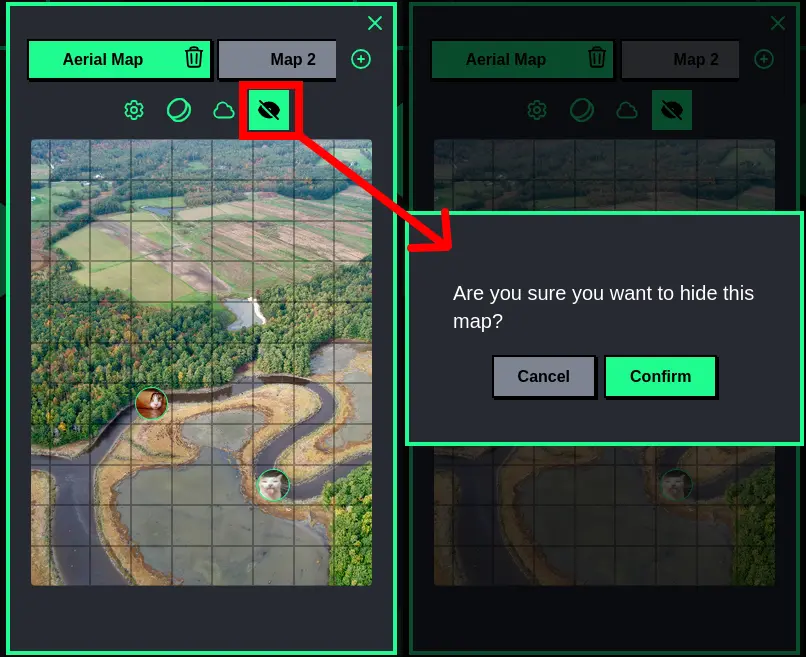
Map Visibility
The fourth map tool button is simply the visibility toggle, this simply shows/hides the currently selected map to the players (if you have a map shown to players and clicks to show a new one, the previously shown map will be hidden then).